
Realtime graphs using Plotly and websockets


As you already know, In our blog we use the websocket protocol intensively, It's a fast and easy way to send data from WiFi connected micro-controllers (such as the ESP8266) to the Browser without anything in between.
Here are some projects with code samples where websockets were used:
Today I'll share with you an example of how you can use Plotly to visualize real-time data in your browser
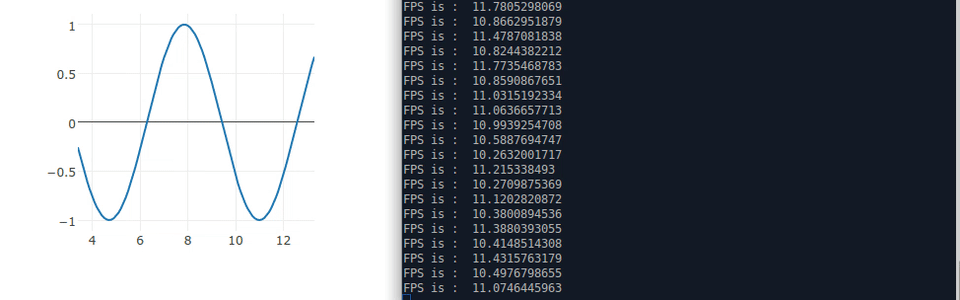
Here is how it looks like:
Here is the code : ploty websocket example
The HTML code creates a websocket (You'll need to change this to the ESP8266 IP and port)
ws = new WebSocket("ws://esp_ip:port/")
After the connection is established, it creates a loop of requesting data from the server
request_data_interval = window.setInterval(requestData, 50);
Then, it parses the json data and creates the graph in the place I asked him to
```
    ws.onmessage = function (evt)
    {
        var received_msg = evt.data;

        data = JSON.parse(evt.data);
        var my_plot = {
            x: data.x,
            y: data.y,
            type: 'scatter',
        };
        Plotly.newPlot('sine-graph', [my_plot]);
    };
```
In order to test this I've used a python library called pywebsocket
I've created a websocket handler named send_graph
All it does is create a sine-wave graph with lots of samples
```
x = np.arange(0,np.pi*10,0.1).tolist()
y = np.sin(x).tolist()
```
And every time the user requests the graph data we send a sliding window of the graph
```
    graph_to_send = json.dumps({
        'x':x[counter:counter+graph_size],
        'y':y[counter:counter+graph_size]
    })
```
and that's it :)
In order to try the pywebsocket library for yourself you should download it and install using your python. Then, copy the send_graph_wsh.py file in the repository to the pywebsocket/example/ folder and then run the next lines:
cd pywebsocket/mod_pywebsocket
python standalone.py -p 9998 -w ../example/
If you open the plot_graphs_from_websocket.html using your browser you'll see the results - and that's it :)


